Home » Integration Support » Konekta
Konekta

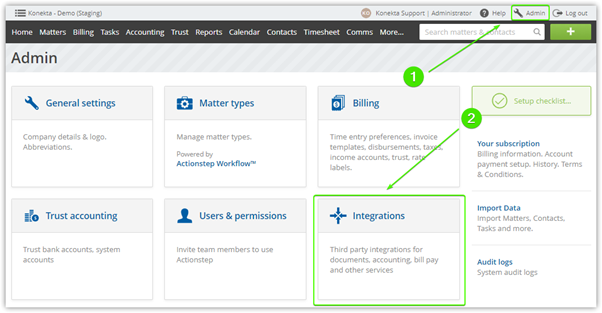
To enable the Konekta Plugin within your Actionstep database you firstly need to click on the admin menu and navigate to the integrations page. Scroll down until you find Konekta and click on Connect with Konekta
1. Within Actionstep, navigate to Admin > Integrations:
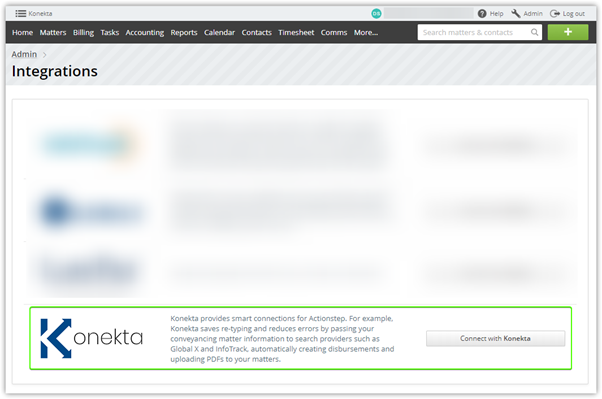
2. Scroll down to find Konekta, then click the Connect with Konekta button:
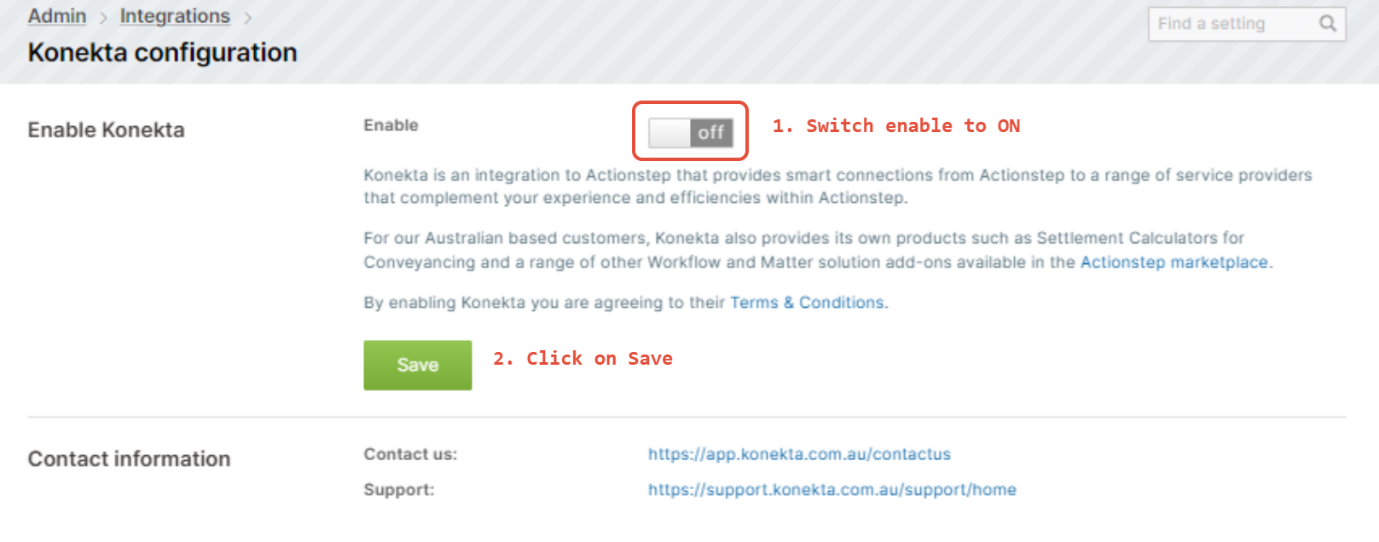
3. Toggle the Enable switch to the on position, then click Save and Manage Konekta Add-ons:
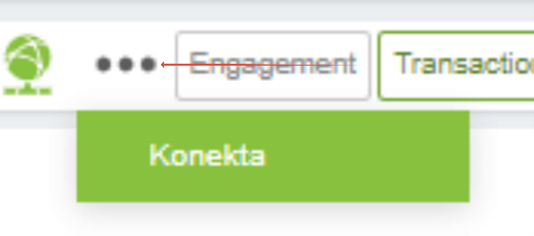
4. Konketa has now been enabled for your database and can now be accessed via any Actionstep matter via the 3 dots plugin menu
Because you are switching from Actionstep to Konekta, you may be prompted to log in again for security:

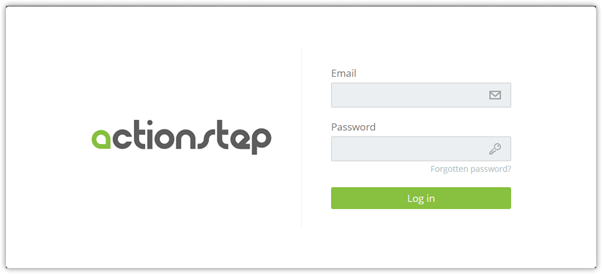
Once logged in you can start using the Konekta products.
Please note that you will be prompted to enter your username and passwords for each of the individual vendor products on first use.

2. Scroll down to find Konekta, then click the Connect with Konekta button:

3. Toggle the Enable switch to the on position, then click Save and Manage Konekta Add-ons:

4. Konketa has now been enabled for your database and can now be accessed via any Actionstep matter via the 3 dots plugin menu

Because you are switching from Actionstep to Konekta, you may be prompted to log in again for security:


Once logged in you can start using the Konekta products.
Please note that you will be prompted to enter your username and passwords for each of the individual vendor products on first use.
If you already have enabled the Konekta Plugin, you then need to enable the InfoTrack integration. If you havent enabled the Konekta Plugin you will need to do this first (see previous step).
You will only need to do each of these once. You will also need to have on hand your InfoTrack username and password for your organisation.
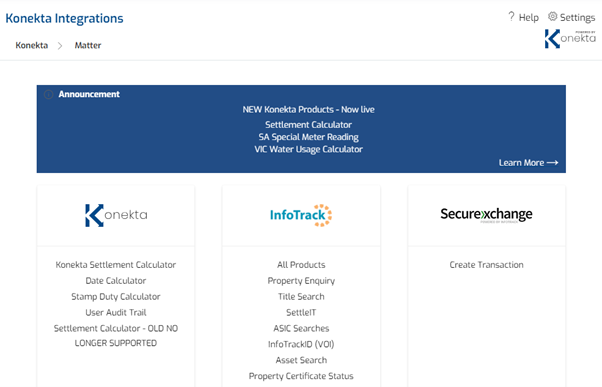
Click on any item under InfoTrack on the Konekta Launch page.
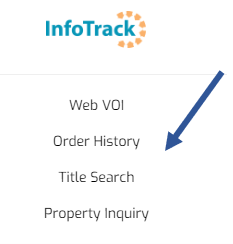
You will then be prompted to Enable InfoTrack.
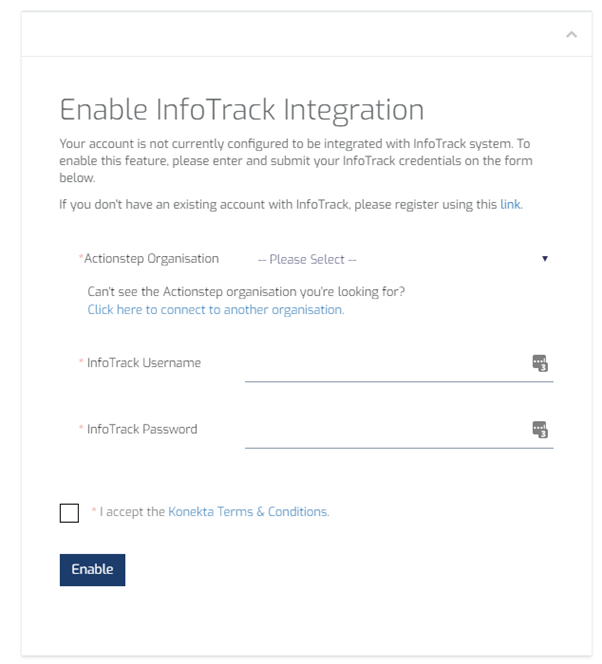
Once you click enable you can start using InfoTrack.
How to order InfoTrack searches
Step 1 – Click on the Konekta Plugin from within your matter to open the Konekta launch page

From the Konekta launch page under the InfoTrack menu select on the required search (note the State will dynamically change based on the state of the Property Address Contact)
Step 2 – For Each User (on their first use only) – will need to authenticate with your Actionstep UserName and Password. This allows us to return the search results back to the matter within Actionstep.
Click the ‘Login with ACTIONSTEP’ button to complete the connection
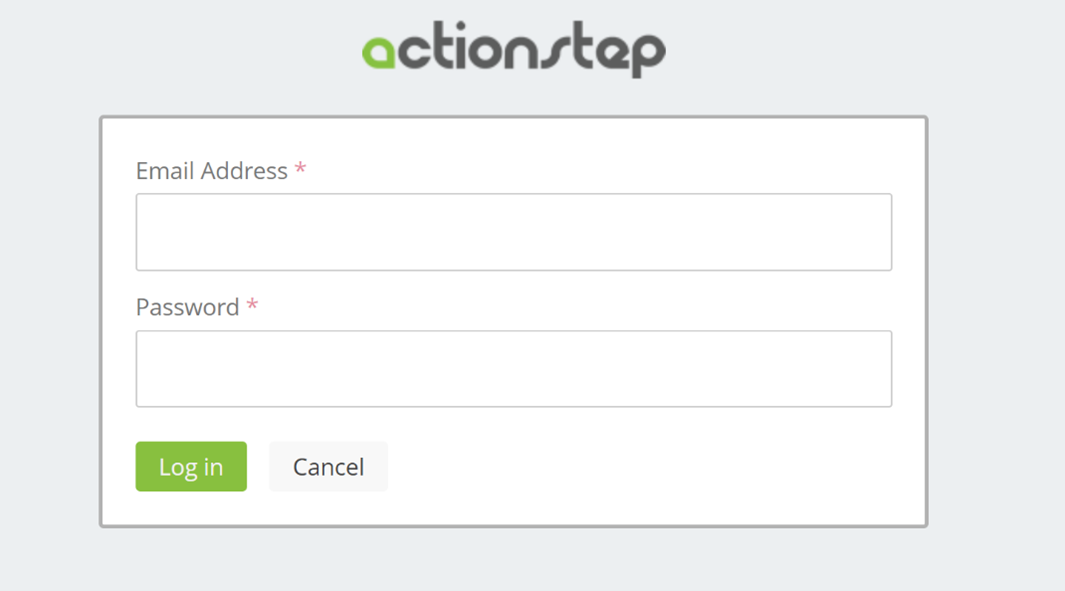
Note: At any time you can revoke the connection from within your ‘MY PROFILE’ within Actionstep.
Step 4 – Place your order with InfoTrack
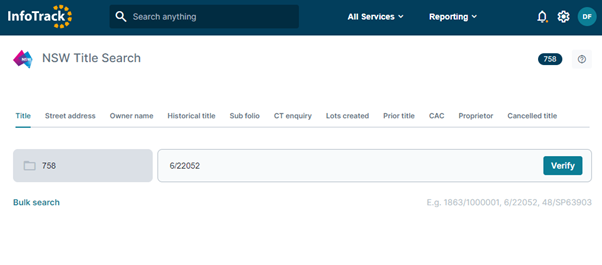
You will now be directed to the InfoTrack order screen.

InfoTrack will now open on a new browser tab onto the relevant search page where details from your matter will be automatically pre-populated. All you will need to do is check that the details are correct , click verify and then order.
Step 5 – View your order
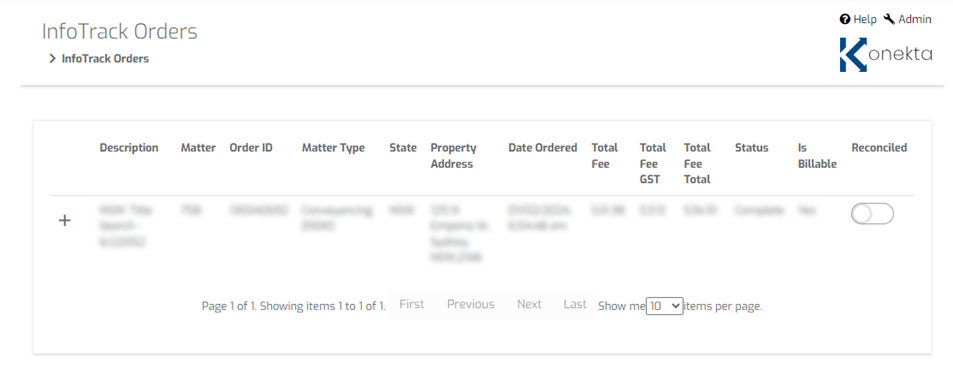
Completed order results will be returned back to the matter in Konekta. Search history is viewable view the InfoTrack Orders Page.
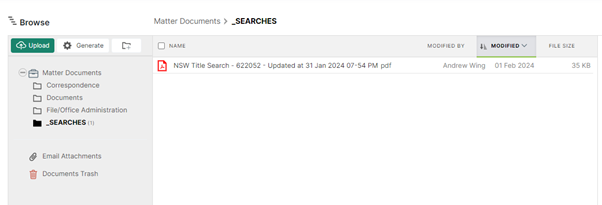
PDF search results will be returned to Konekta and automatically saved in the SEARCHES folder.
Search costs will be returned as a disbursement to Konekta automatically.

You will only need to do each of these once. You will also need to have on hand your InfoTrack username and password for your organisation.
Click on any item under InfoTrack on the Konekta Launch page.

You will then be prompted to Enable InfoTrack.

Once you click enable you can start using InfoTrack.
How to order InfoTrack searches
Step 1 – Click on the Konekta Plugin from within your matter to open the Konekta launch page

From the Konekta launch page under the InfoTrack menu select on the required search (note the State will dynamically change based on the state of the Property Address Contact)

Step 2 – For Each User (on their first use only) – will need to authenticate with your Actionstep UserName and Password. This allows us to return the search results back to the matter within Actionstep.
Click the ‘Login with ACTIONSTEP’ button to complete the connection

Note: At any time you can revoke the connection from within your ‘MY PROFILE’ within Actionstep.
Step 4 – Place your order with InfoTrack
You will now be directed to the InfoTrack order screen.

InfoTrack will now open on a new browser tab onto the relevant search page where details from your matter will be automatically pre-populated. All you will need to do is check that the details are correct , click verify and then order.

Step 5 – View your order
Completed order results will be returned back to the matter in Konekta. Search history is viewable view the InfoTrack Orders Page.

PDF search results will be returned to Konekta and automatically saved in the SEARCHES folder.

Search costs will be returned as a disbursement to Konekta automatically.

Konekta has built a Reconciliation Tool to assist you in matching your InfoTrack Invoice against the disbursements posted in Actiontep to ensure that you recovery all of your search costs from the client.
Before using the tool please contact suppport@konekta.com.au to request this service and advising the following details:
• Frequency of reconciliation (fortnightly/monthly)
• Email address for .csv to be sent
Konekta will then arrange for InfoTrack to provide your finance team with the necessary reports to get started.
Once you have the Report
Once you start receiving the .csv from InfoTrack you simply just need to access the Konekta tile on the Konekta Launch page. From here select the EOM/Order Reconciliation link.
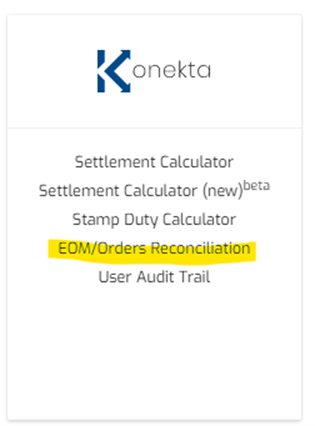
This will then open the Reconciliation Tool. Simply just upload your .csv you received from InfoTrack and select the reconcile button.

Your reconcilation results will then be displayed.
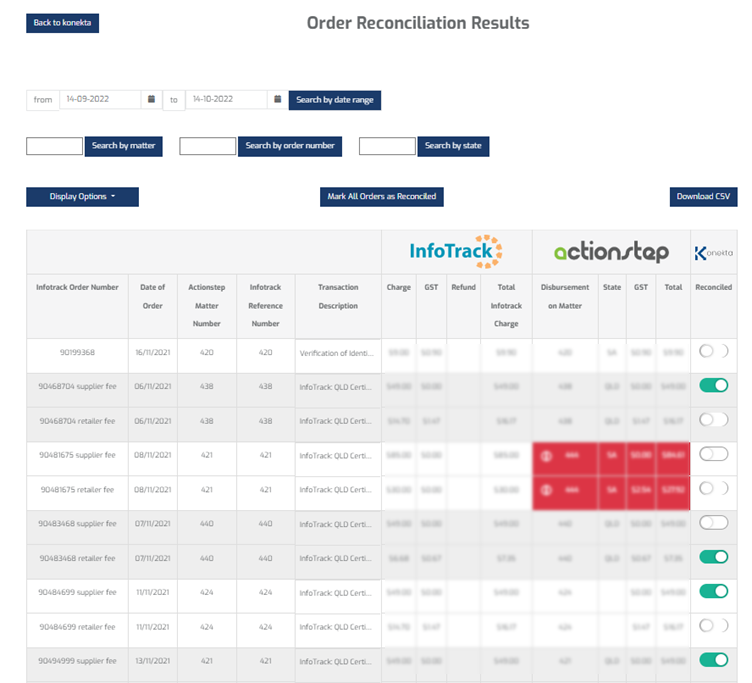
Wheree you see the toggle has been flicked to Green that indicates there is a match between your InfoTrack invoice and Disbursements posted to Actionstep.
You will note above there are the red highlighted items. These indicate that Konekta has identified an issue that needs investigating. For example:
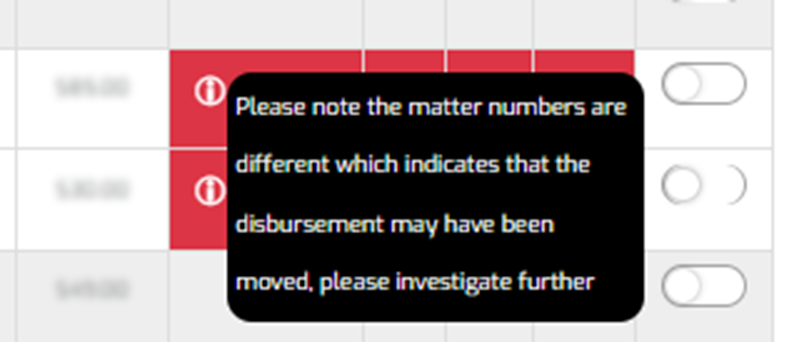
Once you have checked all your entries you can download the reconciliation csv by clicking the download button in the top right corner.
Before using the tool please contact suppport@konekta.com.au to request this service and advising the following details:
• Frequency of reconciliation (fortnightly/monthly)
• Email address for .csv to be sent
Konekta will then arrange for InfoTrack to provide your finance team with the necessary reports to get started.
Once you have the Report
Once you start receiving the .csv from InfoTrack you simply just need to access the Konekta tile on the Konekta Launch page. From here select the EOM/Order Reconciliation link.

This will then open the Reconciliation Tool. Simply just upload your .csv you received from InfoTrack and select the reconcile button.

Your reconcilation results will then be displayed.

Wheree you see the toggle has been flicked to Green that indicates there is a match between your InfoTrack invoice and Disbursements posted to Actionstep.
You will note above there are the red highlighted items. These indicate that Konekta has identified an issue that needs investigating. For example:

Once you have checked all your entries you can download the reconciliation csv by clicking the download button in the top right corner.
1. Login to Smokeball
 2. Go to the Smokeball Settings
File → Smokeball Settings
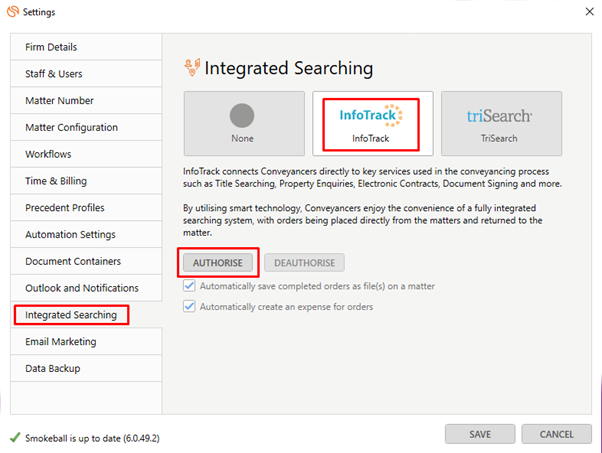
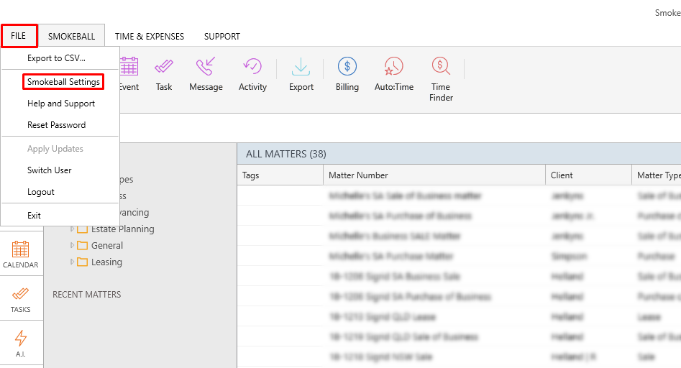 3. Select InfoTrack as your search Provider
Integrated Searching → Select InfoTrack → Click Authorise
 2. Go to the Smokeball Settings
File → Smokeball Settings
 3. Select InfoTrack as your search Provider
Integrated Searching → Select InfoTrack → Click Authorise

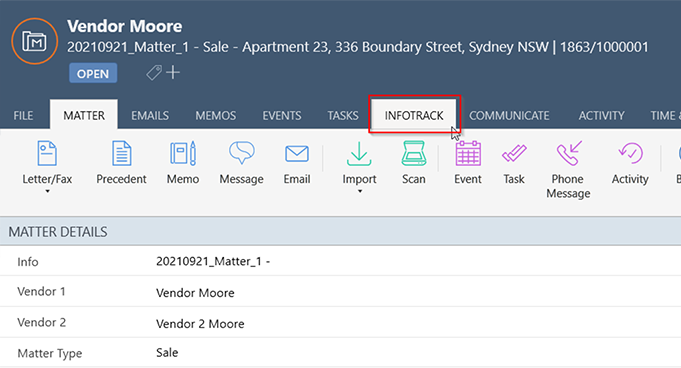
Open a matter and click on the InfoTrack Tab
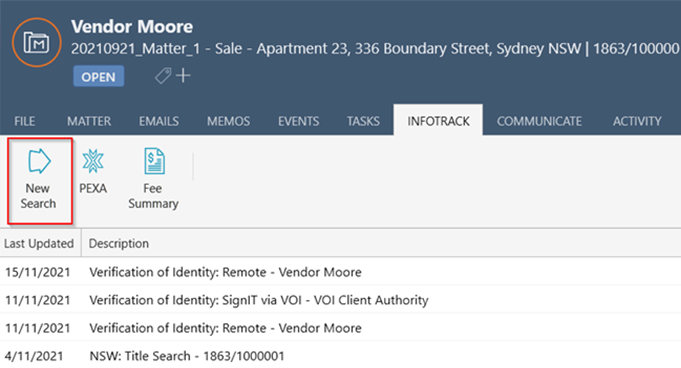 In the tab, it will show the history of orders for that matter, to start searching with InfoTrack just click on the ‘New Searches’ Button which will direct you to the InfoTrack website.
 In the tab, it will show the history of orders for that matter, to start searching with InfoTrack just click on the ‘New Searches’ Button which will direct you to the InfoTrack website.


