AML Onboarding & VOI

Compliant client onboarding and identity verification

AML/CTF Compliance Centre

Complimentary, all-inclusive AML/CTF solution

Searches and Certificates

Order all your searches and certificates in one place

Property Interface

A dynamic, matter specific environment

Family Law Interface

Manage family law matters with one solution

Wills & Estates Interface

Simplify estate administration and planning

Contract Review tool

Review contracts faster with AI-assisted precision

Settlement Services

Electronically lodge registry documents and settlements

Financial Disclosure

Securely collate client financial documentation

Process Serving

Serve documents fast with tracking

Practice Management Integration

Streamline administrative tasks and optimise workflows

Integration Support Guides

Access our support guides for comprehensive self-help assistance

InfoTrack Connect

Allows suppliers to connect their products and services with the InfoTrack Ecosystem

Next Gen Integration

Learn how software and integrations can transform the way you work

News and Insights

Find out the latest industry updates

AML/CTF Training

Take on compliance with confidence

Events and Webinars

Take your professional development to the next level

Cyber Security Awareness Training

Build your cyber resilience

Property Market Update

Discover leading edge property insights

2025 State of Real Estate Report

Insights from Australian Buyers and Sellers

playbook playbook white logo
Monthly digest covering the latest news for legal and conveyancing industries.

About Us

Learn more about who we are and what we do

Our Team

Find out who drives InfoTrack's innovation and strategy

Join Us

Be a part of our award-winning culture

Media

Featured media releases and mentions

Contact

Get in touch with a member of our team

Awards

Showcasing our people, solutions and service

Discover our award-winning technical innovations.
Home » Integration Support » NebuLaw

Nebulaw

This guide is intended for your Salesforce System Administrator, it covers the setup of a Named Credential before your Users can setup their personal connection and start using InfoTrack

Step 1

Login to Salesforce
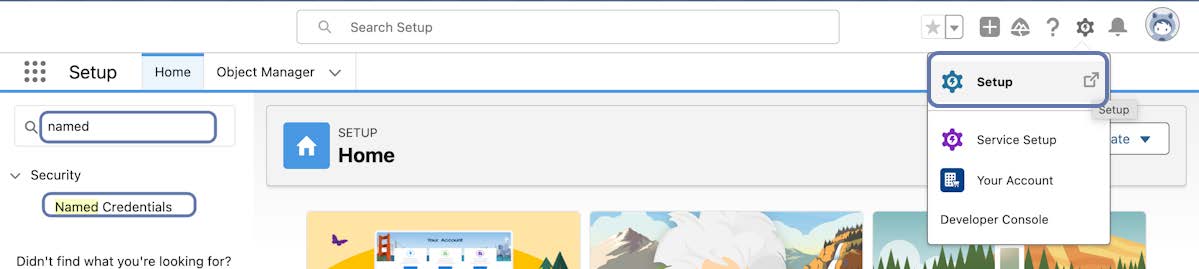
1. Head to Setup (gear icon top right)
2. Type ‘Named Credential’ in the quick find box
4. Select Named Credential from the results
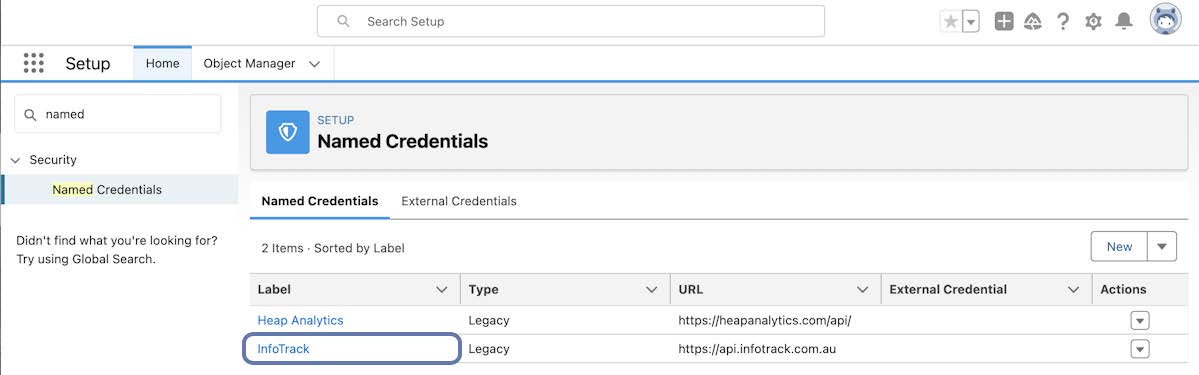
E. Click InfoTrack to edit


Step 2

Open InfoTrack Named Credential
Click the InfoTrack label to open


Step 3

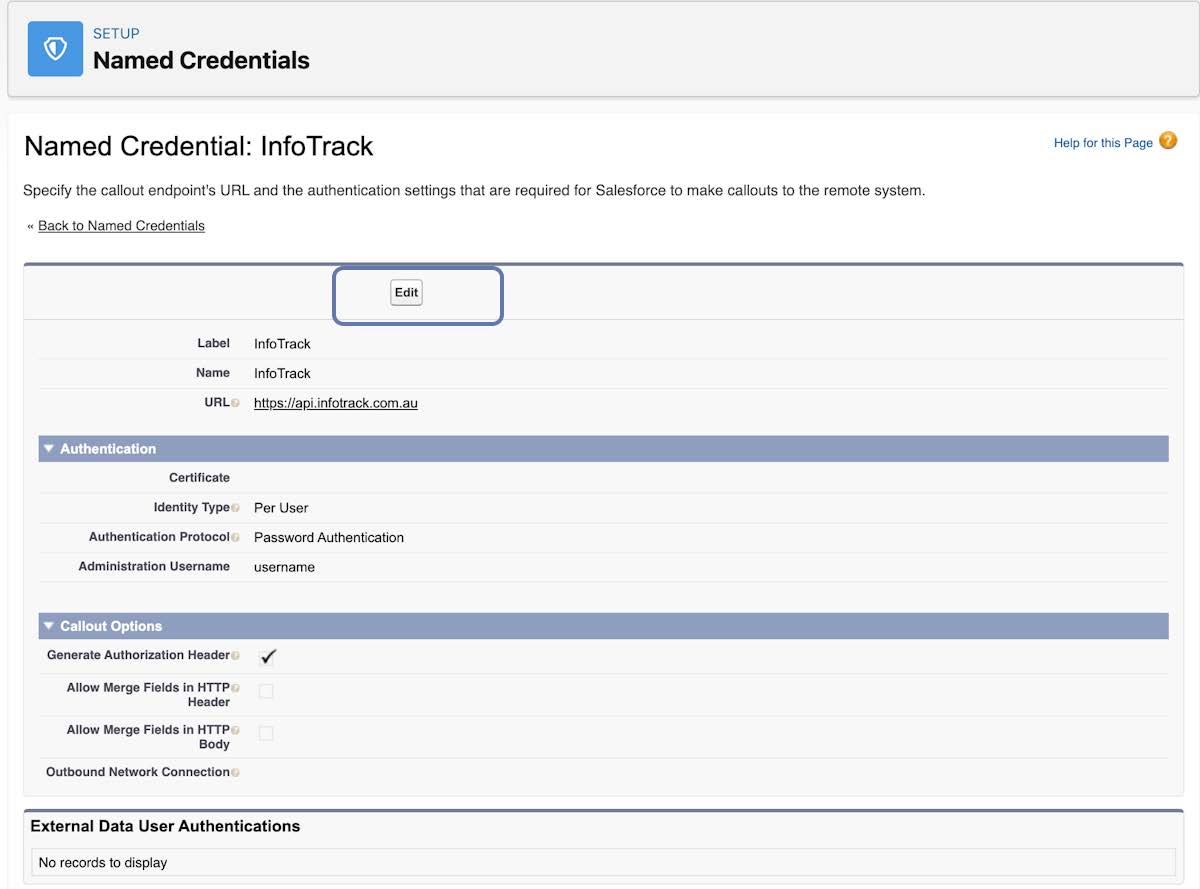
Edit Named Credential
Select the Edit button


Step 4

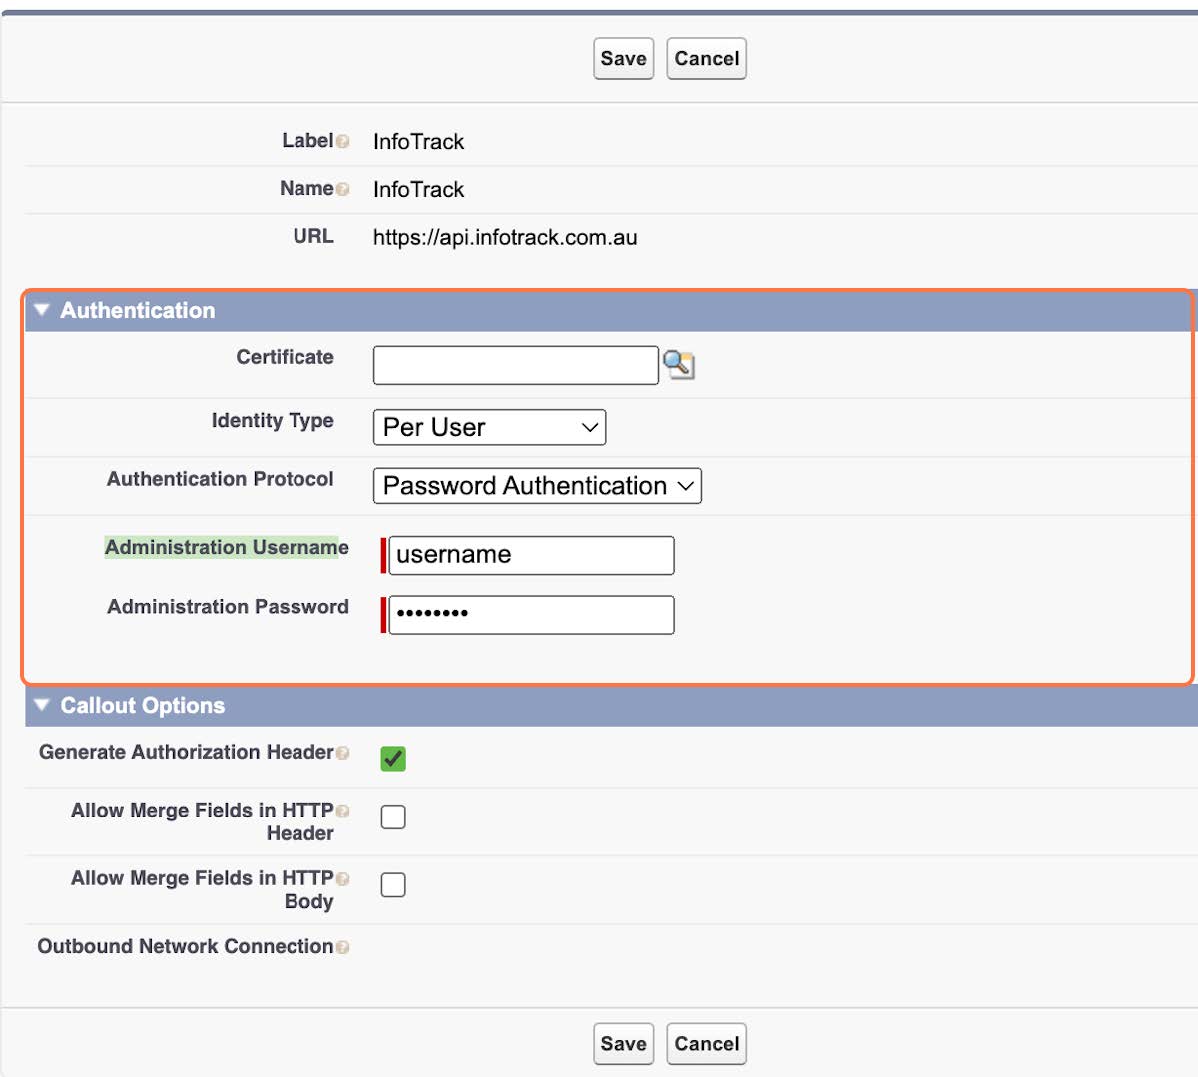
Edit Authentication Details
1. Certificate – Leave this blank
2. Identity Type – Update to ‘Per User’
3. Authentication Protocol – Select ‘Password Authentication’
4. Administration Username – The Administration Username from your firms InfoTrack account
5. Administration Password – The Password for your firms Administration Account for InfoTrack
6. Leave all other setting as is and save


Step 5

User Access
To finalise setup ensure the required users have ‘Nebulaw Conveyancing’ permission set assigned to either their Profile or User record in Salesforce. Once complete users can finalise setup by following the related guide Configure InfoTrack Credentials Per User

Follow along to authenticate your user record and conduct your first search.

Step 1

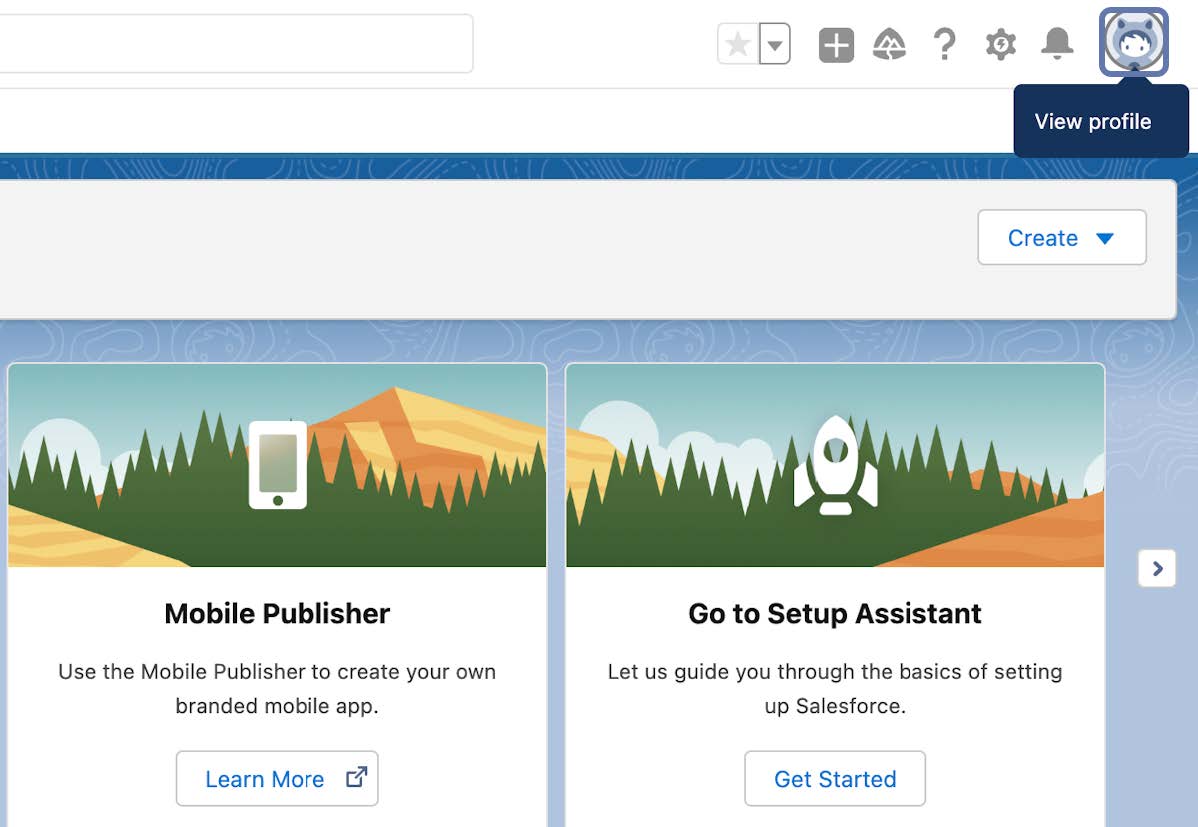
Login to your org and click the profile icon


Step 2

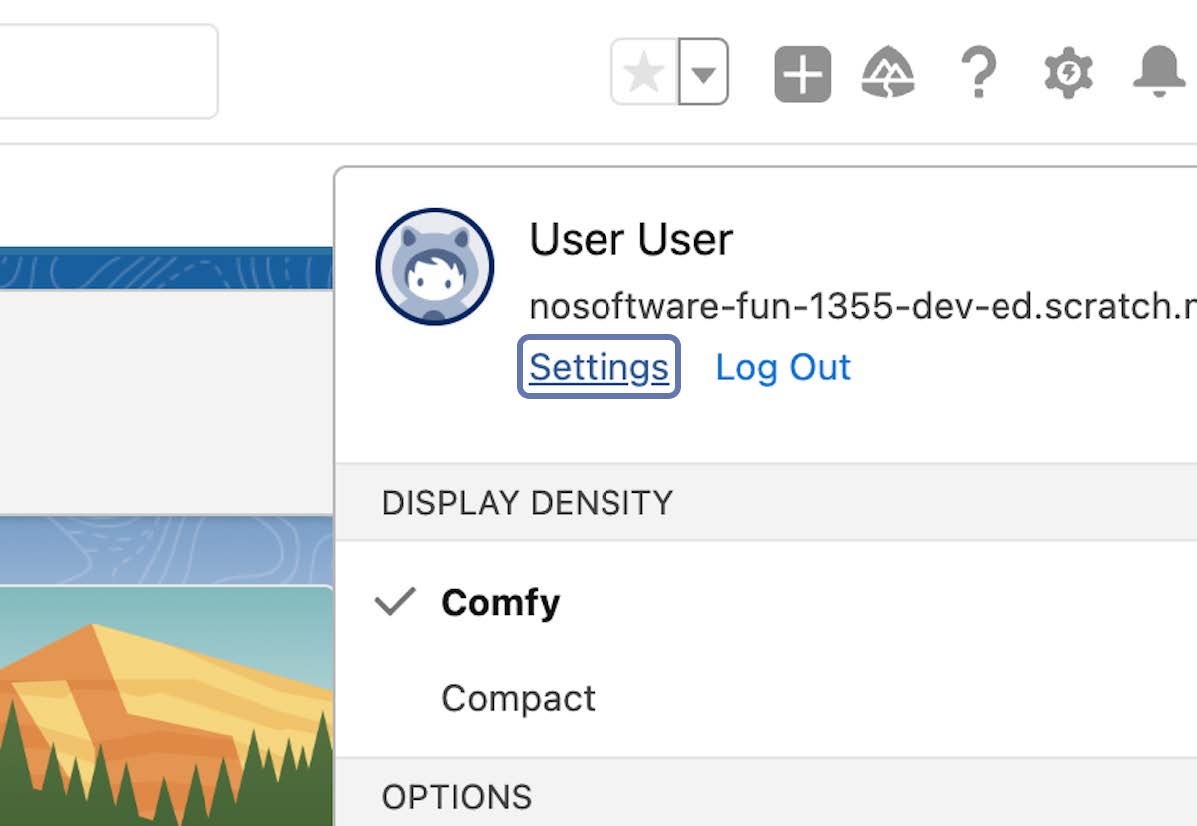
Click on Settings


Step 3

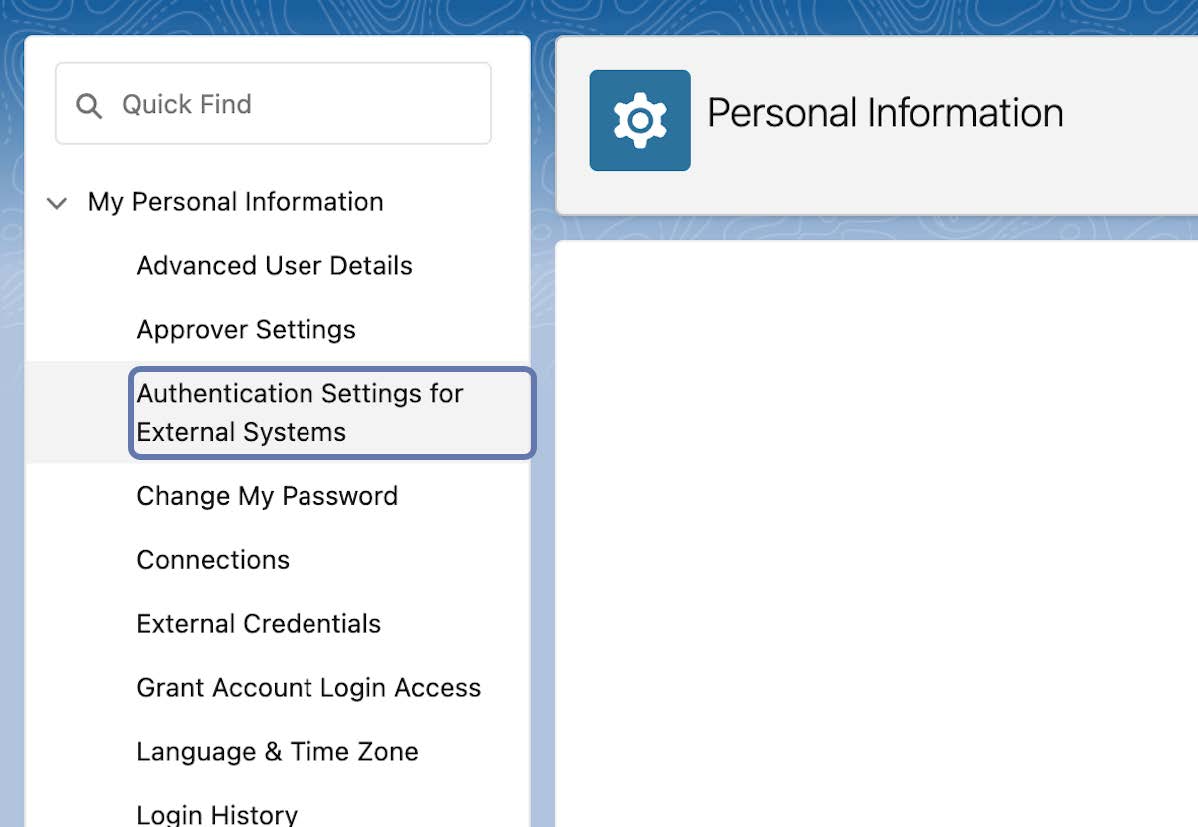
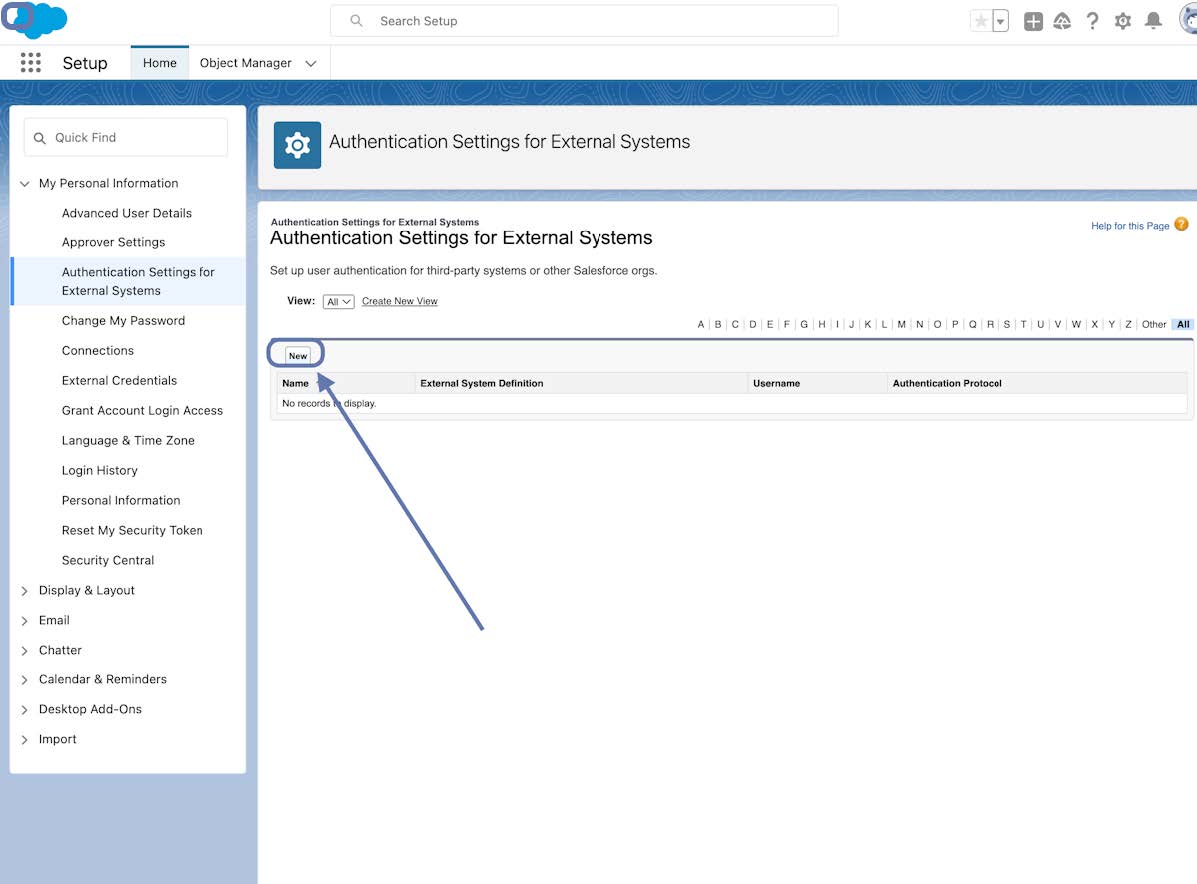
Click on authentication Settings for External System


Step 4

Select the New button


Step 5

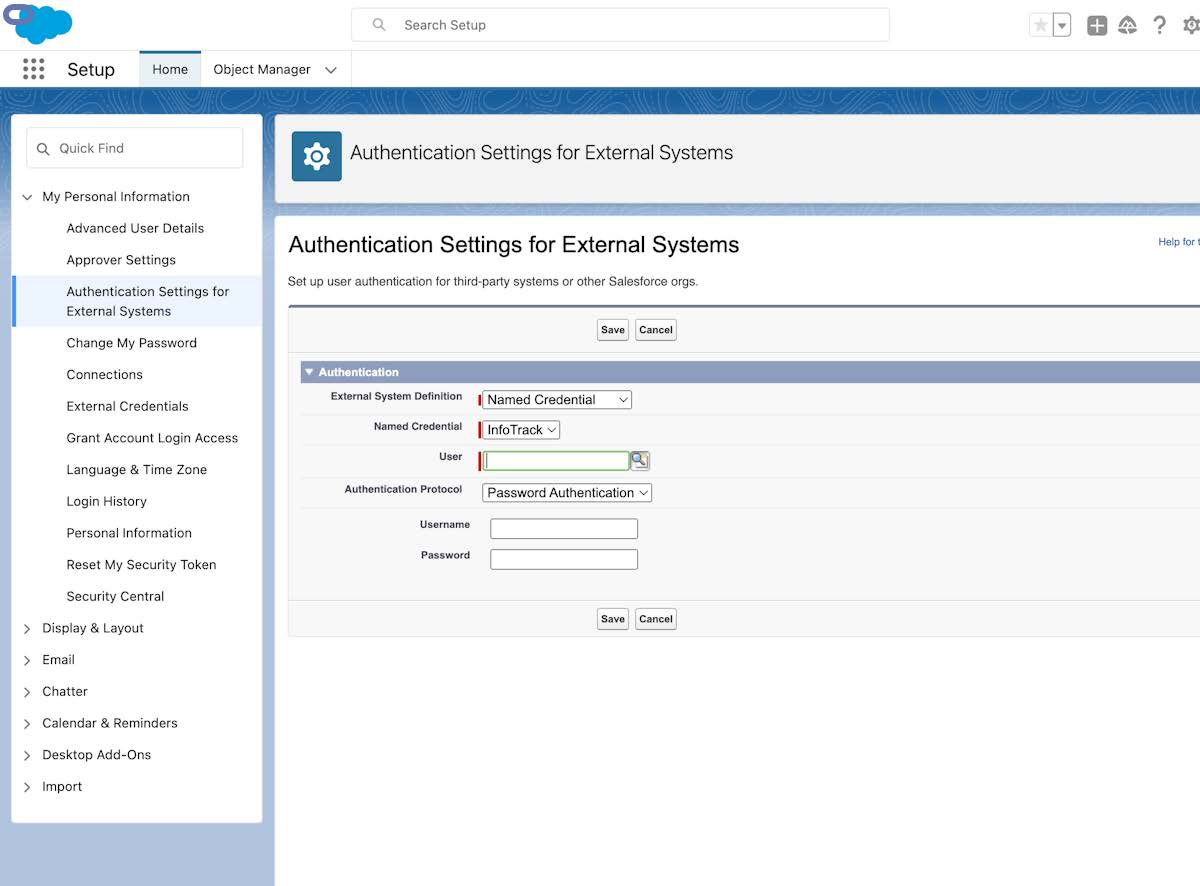
Provide details
1. External System Definition – Name Credential
2. Named Credential; – InfoTrack
3. User – select the magnifier icon to search and select your user record (search by your name)
4. Authentication Protocol – Select Password Authentication
5. Username – Enter your InfoTrack Username
6. Password – Enter your InfoTrack Password
Save and Setup


Step 6

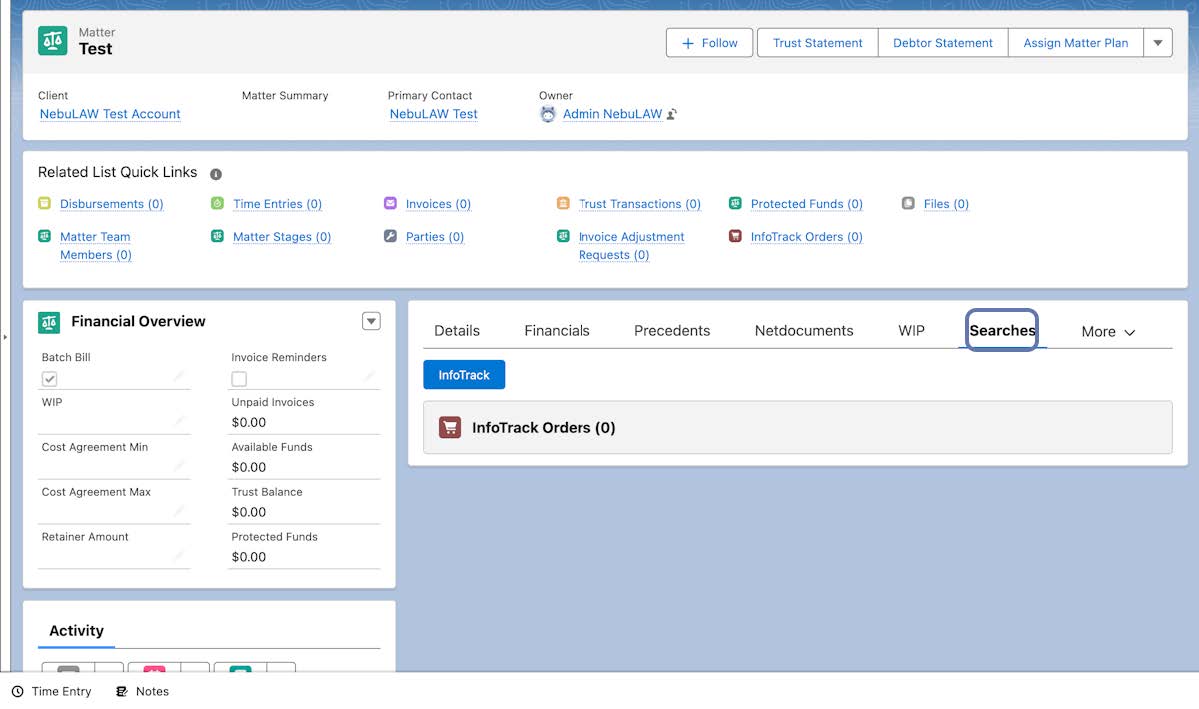
Conduct Four First Search
Searches are completed for a Matter record page, to conduct your first search open a Matter record page, locate the Searches tab and select the InfoTrack button.

You will be taken to the InfoTrack website to complete the search, searches done are then synced back to the system and will appear under InfoTrack Orders.

Disbursements will also be created for the amount and GST components as charges by InfoTrack. The description is defaulted to the InfoTrack order but can be changed before invoicing for more details if required.


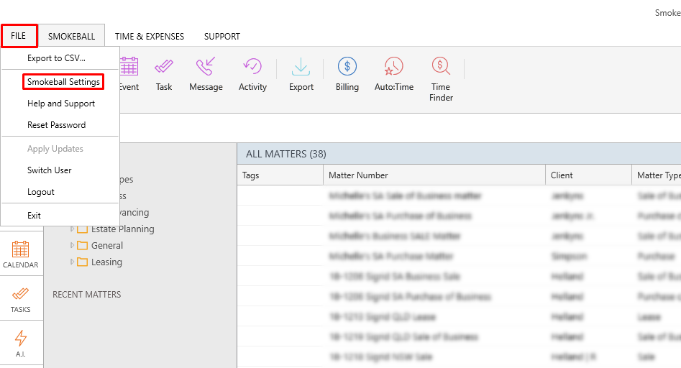
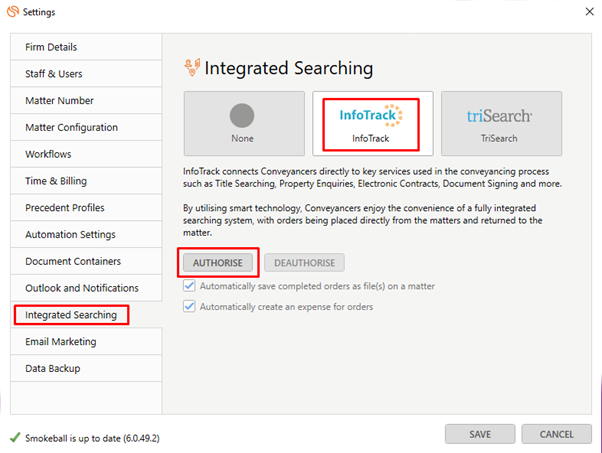
1. Login to Smokeball  2. Go to the Smokeball Settings  File → Smokeball Settings 3. Select InfoTrack as your search Provider Integrated Searching → Select InfoTrack → Click Authorise
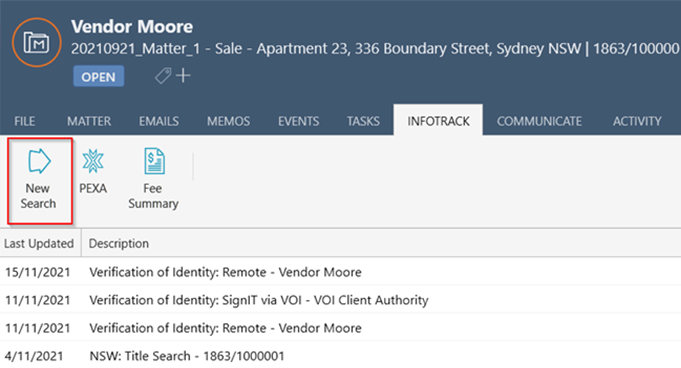
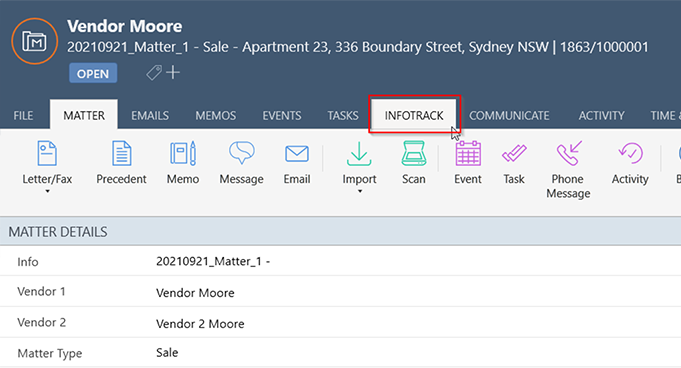
Open a matter and click on the InfoTrack Tab In the tab, it will show the history of orders for that matter, to start searching with InfoTrack just click on the ‘New Searches’ Button which will direct you to the InfoTrack website.