Compliant client onboarding and identity verification
Complimentary, all-inclusive AML/CTF solution
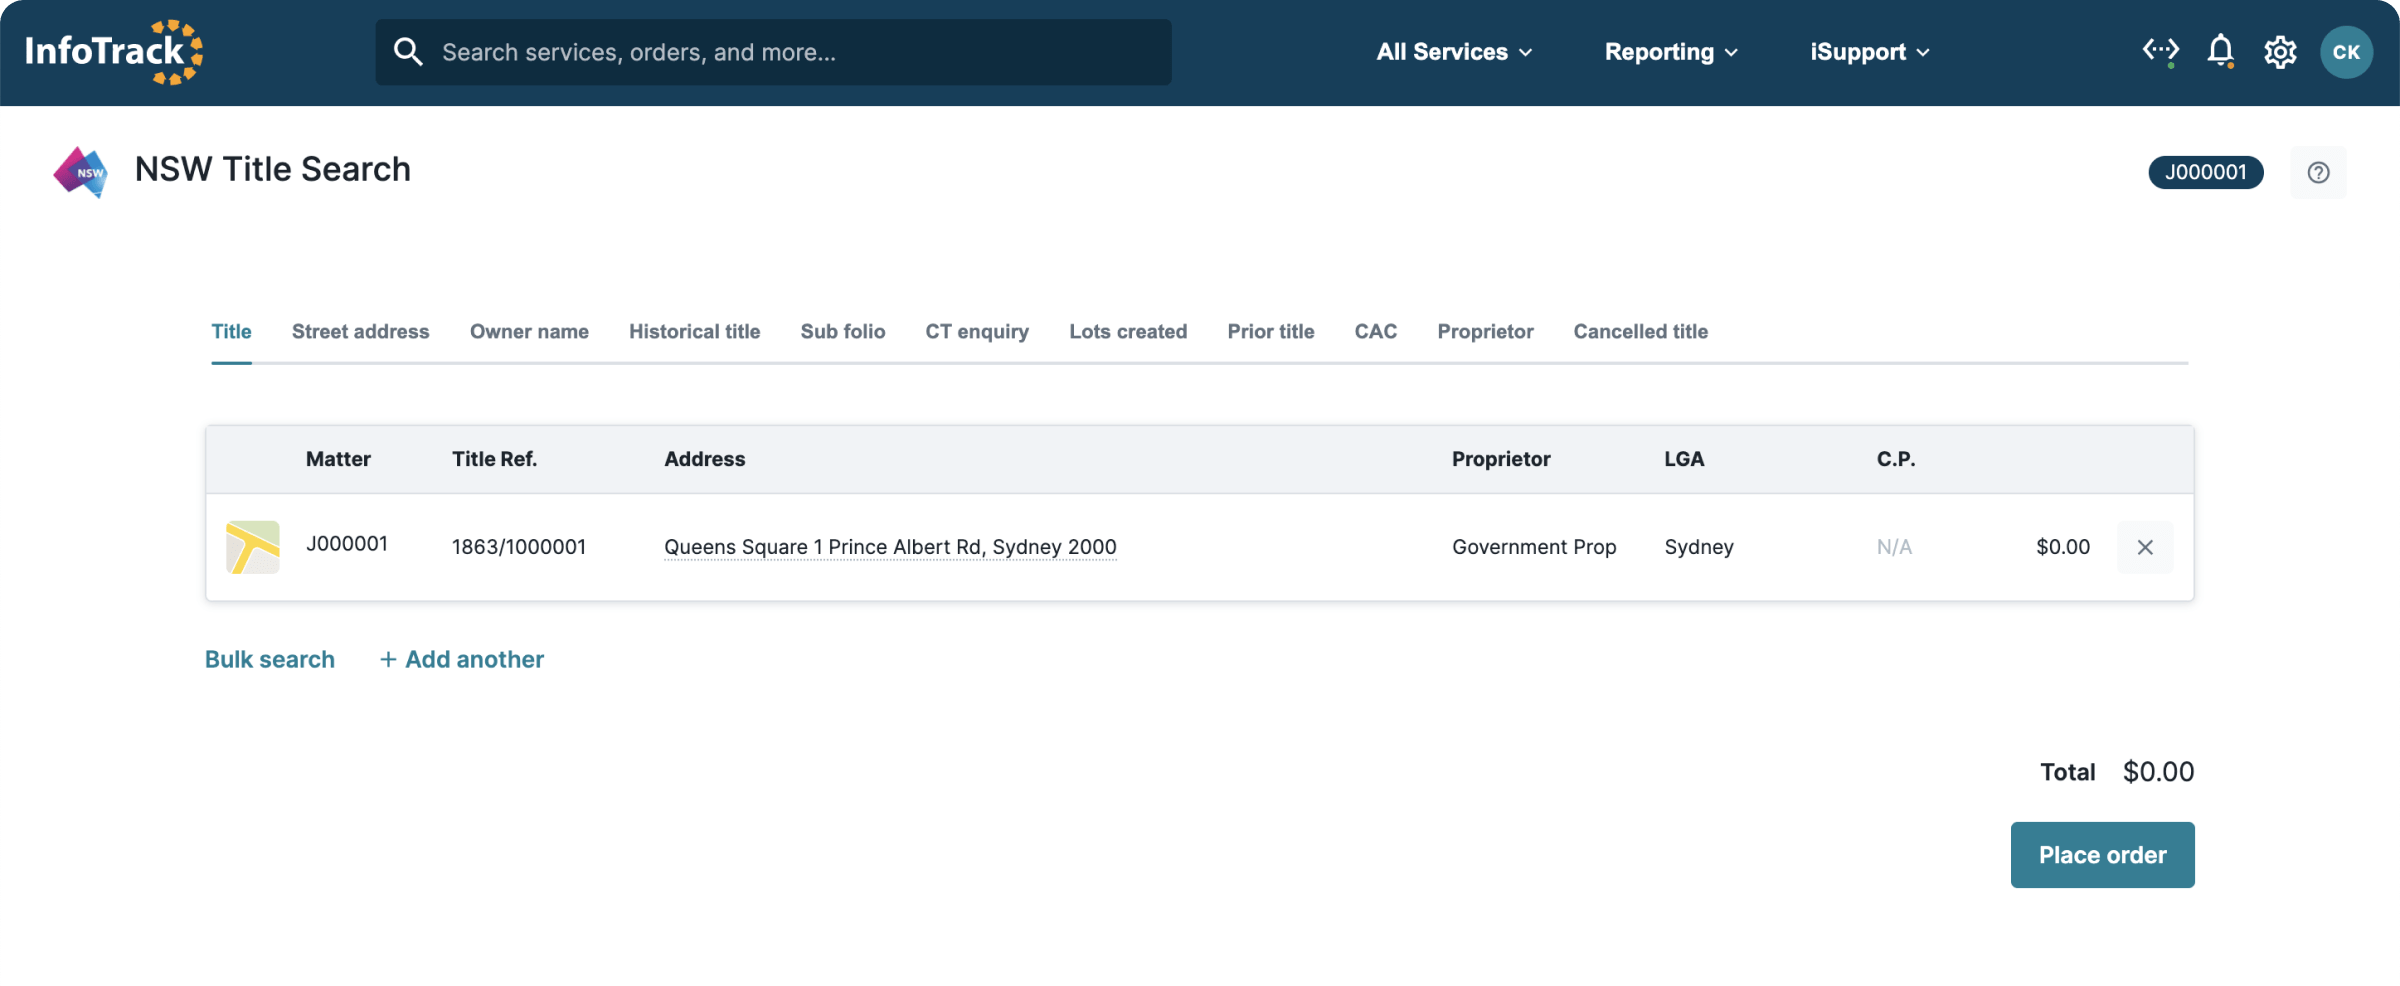
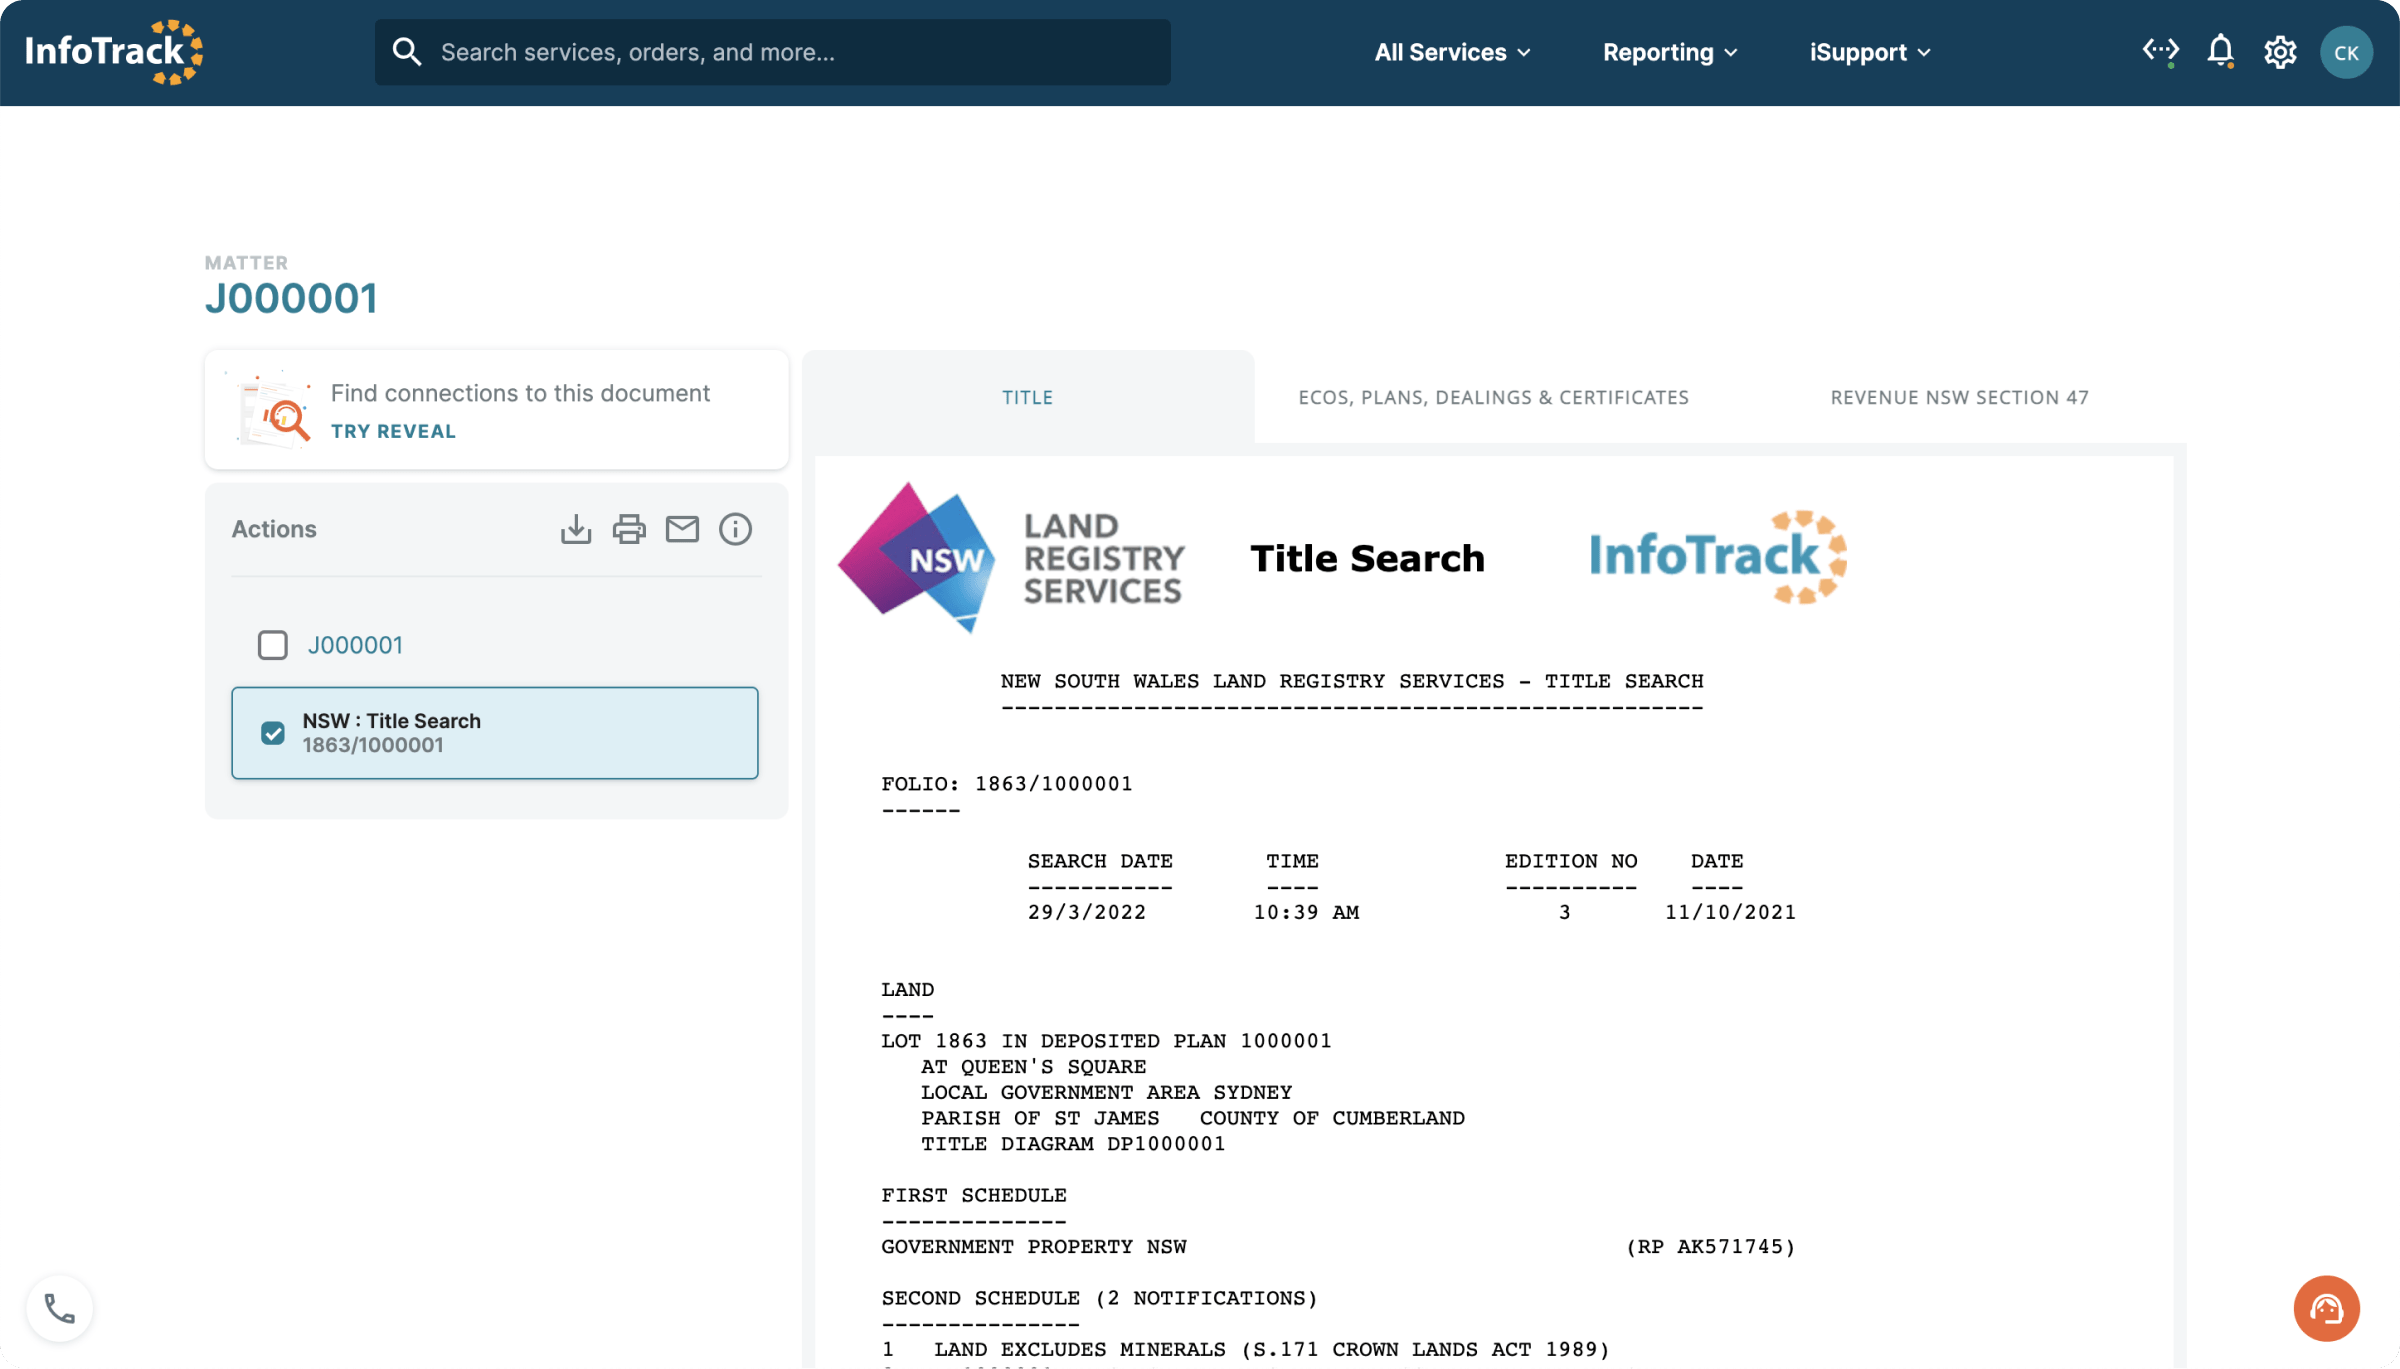
Order all your searches and certificates in one place
A dynamic, matter specific environment
Manage family law matters with one solution
Simplify estate administration and planning
Review contracts faster with AI-assisted precision
Electronically lodge registry documents and settlements
Securely collate client financial documentation
Serve documents fast with tracking
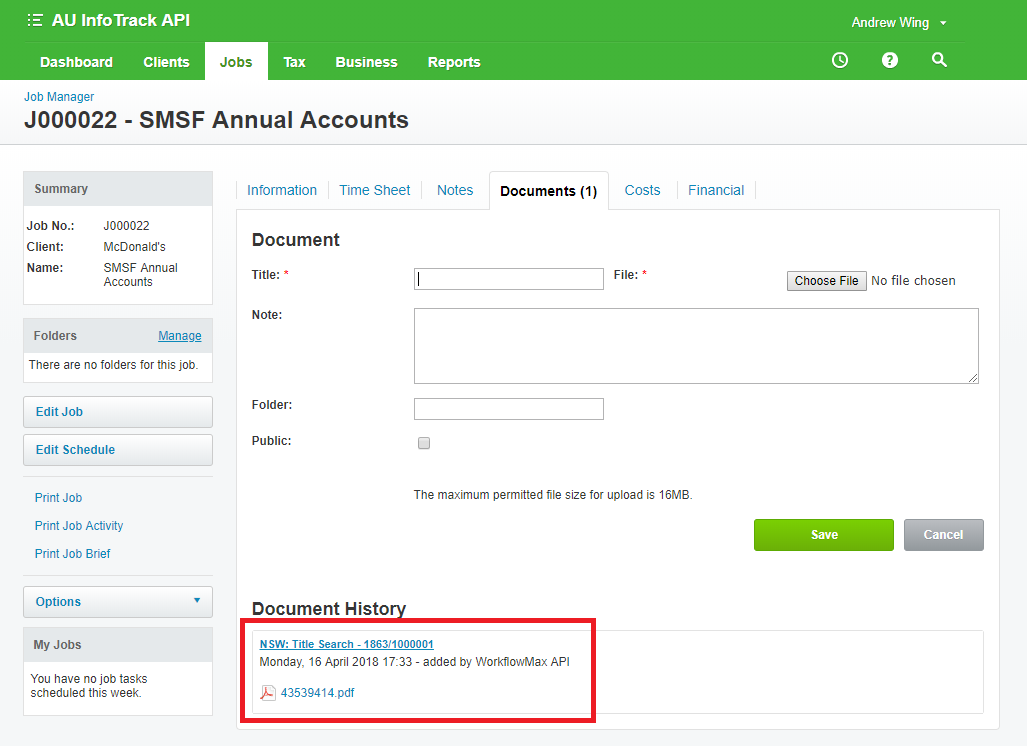
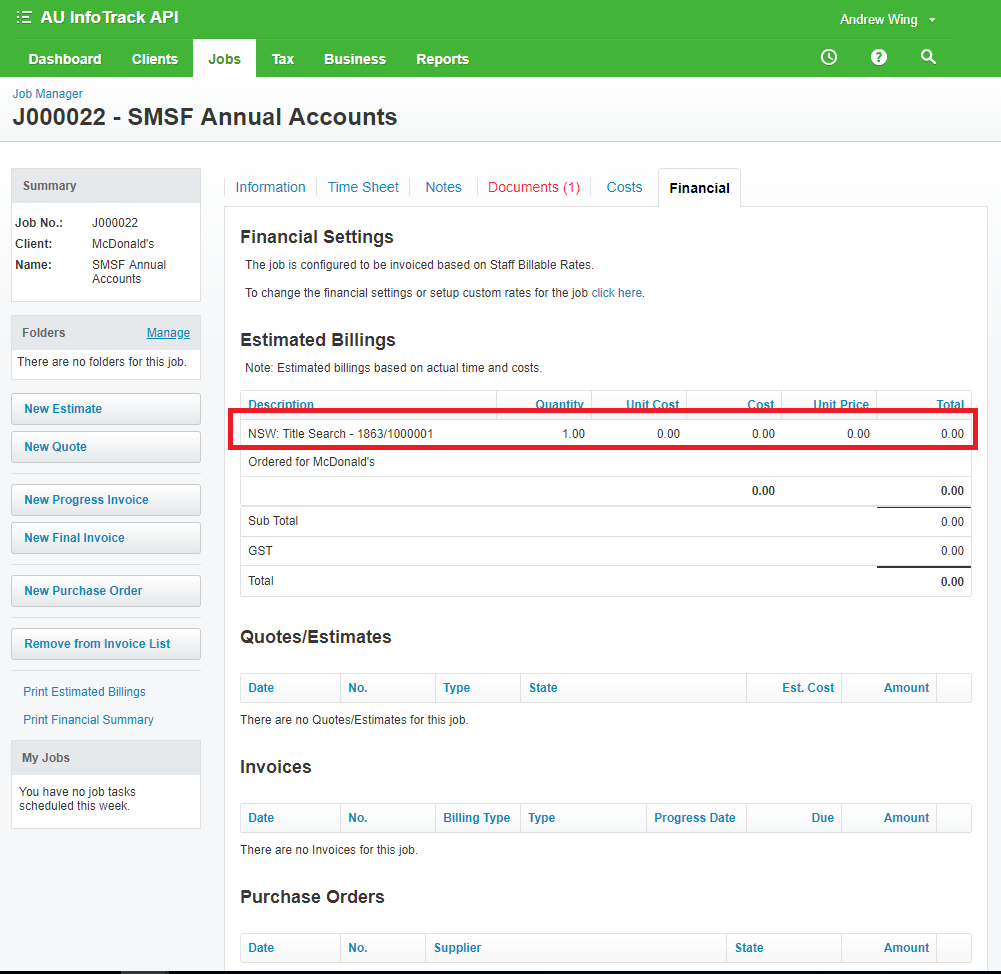
Practice Management Integration
Streamline administrative tasks and optimise workflows
Access our support guides for comprehensive self-help assistance
Allows suppliers to connect their products and services with the InfoTrack Ecosystem
Learn how software and integrations can transform the way you work
Find out the latest industry updates
Take on compliance with confidence
Take your professional development to the next level
Cyber Security Awareness Training
Build your cyber resilience
Discover leading edge property insights
Access InfoTrack directly inside Claude Cowork